- Australia ▾
- Topographic
▾
- Australia AUSTopo 250k (2025)
- Australia 50k Geoscience maps
- Australia 100k Geoscience maps
- Australia 250k Geoscience maps
- Australia 1:1m Geoscience maps
- New Zealand 50k maps
- New Zealand 250k maps
- New South Wales 25k maps
- New South Wales 50k maps
- New South Wales 100k maps
- Queensland 10k maps
- Queensland 25k maps
- Queensland 50k maps
- Queensland 100k maps
- Western Australia 25k maps
- Western Australia 50k maps
- Western Australia 100k maps
- Compasses
- Software
- GPS Systems
- International ▾
- Wall Maps
▾
- World
- Australia & New Zealand
- Countries, Continents & Regions
- Historical
- Vintage National Geographic
- Australian Capital Territory
- New South Wales
- Northern Territory
- Queensland
- South Australia
- Tasmania
- Victoria
- Western Australia
- Celestial
- Children's
- Mining & Resources
- Wine Maps
- Healthcare
- Postcode Maps
- Electoral Maps
- Nautical ▾
- Flags
▾
- Australian Flag Sets & Banners
- Flag Bunting
- Handwavers
- Australian National Flags
- Aboriginal Flags
- Torres Strait Islander Flags
- International Flags
- Flagpoles & Accessories
- Australian Capital Territory Flags
- New South Wales Flags
- Northern Territory Flags
- Queensland Flags
- South Australia Flags
- Tasmania Flags
- Victoria Flags
- Western Australia Flags
- Gifts ▾
- Globes ▾
Dear valued customer. Please note that our checkout is not supported by old browsers. Please use a recent browser to access all checkout capabilities


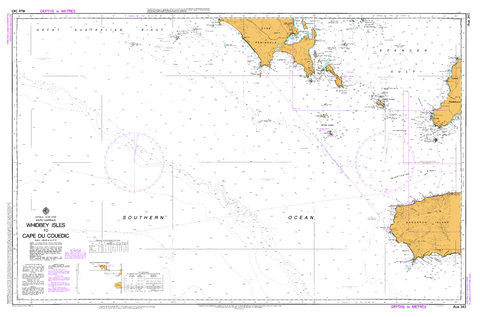
AUS 136 - Approaches to Whyalla and Port Pirie Nautical Chart
$49.95
Afterpay is only available for orders between $50.00 and $1000.00 More info
AUS 136 — Approaches to Whyalla & Port Pirie, SA Nautical Chart
For skippers, pilots, and coastal crews transiting the Spencer Gulf approach lanes
Make precise entries to berth with AUS 136. This sheet provides targeted approach coverage with UTM projection across dedicated panels—1:25,000 for approaches and 1:7,500 for wharf detail—ideal for plotting leads, turning points, and final waypoint checks into Port Pirie.
Why skippers choose this chart
-
🧭 Built for harbour approach — Focused approach and alongside detail for Port Pirie (and region).
-
🚢 Traffic & approach awareness — Align fairways, leads, and landfall bearings with confidence.
-
🛰️ Universal Transverse Mercator — Clean bearings and GPS plotting at close quarters.
-
📍 Exact bounds — Panel limits listed below for quick position checks.
-
🗺️ Deck-ready materials — Writeable laminate front face for chart-correction pencils.
-
🇦🇺 Printed in Australia — Colour-managed, hand-checked.
Coverage
-
Subchart — AUS 136/1: Approaches to Port Pirie
-
Scale: 1:25,000 · Projection: Universal Transverse Mercator
-
Bounds: N 33°01.00′ S · S 33°09.80′ S · E 138°02.90′ E · W 137°55.69′ E
-
Publication: 22-Mar-1976 · Latest Edition: 20-Feb-2026
-
-
Subchart — AUS 136/3: Port Pirie Wharves
-
Scale: 1:7,500 · Projection: Universal Transverse Mercator
-
Bounds: N 33°08.36′ S · S 33°11.00′ S · E 138°01.41′ E · W 138°00.50′ E
-
Publication: 22-Mar-1976 · Latest Edition: 20-Feb-2026
-
Premium materials & finishes
-
Paper (120 gsm matte) — Crisp, flexible and chart-table friendly; ideal under nav-station glass.
-
Laminated (soft-matte front / gloss back, edge-sealed) — Front side is low-glare and writeable with chart-correcting/grease pencils; gloss back adds rigidity. Wipes clean with a soft cloth.
Note: We’ve intentionally configured the laminate with a soft-matte writeable face and a gloss reverse so you can annotate pilotage notes, fixes and ETAs directly on the chart, then clean down between passages.
On-board & ashore use
-
🧭 Pilotage & approach planning — Plot leads, turning basins, and contingency options.
-
📒 Crew briefings — Clear layout for marks, lights, and waypoint verification.
-
🛠️ Bridge/club display — Durable laminated option for noticeboards and training rooms.
-
🎁 Gift for skippers — A practical, good-looking approach chart for SA crews.
Specifications
| Field | Detail |
|---|---|
| Chart Number | AUS 136 |
| Title | Australia South Coast — South Australia — Approaches to Whyalla and Port Pirie |
| Geographic Location | Australia |
| Scale (main) | Multiple panels (see Coverage): 1:25,000; 1:7,500 |
| Projection | Universal Transverse Mercator |
| North / South Limits | See Coverage |
| East / West Limits | See Coverage |
| Publication Date | 22-Mar-1976 |
| Latest Edition | 20-Feb-2026 |
| Sheet Size | 770 mm (W) × 1100 mm (H) |
| Available Finishes | Paper (120 gsm matte); Laminated (soft-matte writeable front, gloss back, edge-sealed) |
| Inks | Pigment-based, fade-resistant |
| Origin | Printed in Australia |
Important note (mariner’s guidance)
This product is ideal for planning, briefing, education, and display. For underway navigation, always carry and consult the latest official hydrographic chart or approved ECDIS and current Notices to Mariners. Local conditions and aids may change.
Ready to make your approach to Port Pirie (and beyond)?
Select your finish above and add to cart. We’ll print locally, hand-check, and ship with care.
Frequently Asked Questions
What area does the AUS 136 - Approaches to Whyalla and Port Pirie Nautical Chart cover?
The AUS 136 - Approaches to Whyalla and Port Pirie Nautical Chart covers the waterway or coastal area described in the product title. Chart coverage area and scale are printed on the chart face. DPI charts are produced at standard nautical chart scales appropriate for safe navigation of Australian coastal and inland waterways.
Is this the most current edition of this chart?
Mapworld stocks the most current editions available. Marine charts are updated regularly — always supplement with current Notices to Mariners.
Is this chart suitable for coastal navigation?
Marine charts are essential tools for coastal passage planning. Always use alongside a GPS chartplotter, current Notices to Mariners, and appropriate navigation training.
Does Mapworld ship the AUS 136 - Approaches to Whyalla and Port Pirie Nautical Chart across Australia?
Yes, Mapworld ships Australia-wide. Standard shipping is a flat $7 rate, with free standard shipping on orders over $75. Express options are available at checkout. Most orders placed before 2pm AEST on weekdays are dispatched same day.
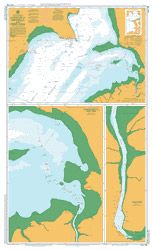
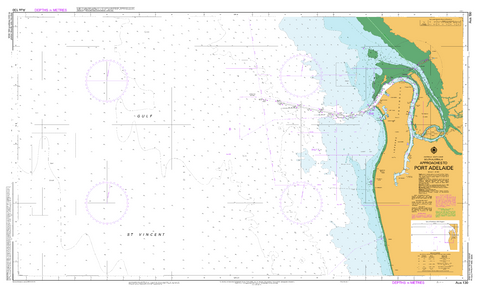
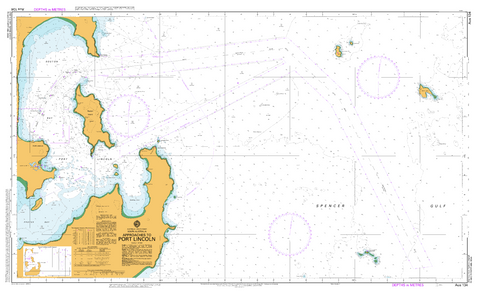
Related Items
© 2026 Mapworld. Website designed by Genie Media
X